Self hosting – scary stuff

I might disappear for a couple of days. I’m not running away or playing hide and seek with you, nor cowering in a dark cupboard (hopefully). I am however, attempting to go down the very scary self hosting route.

I have spent the best part of two hours marvelling over the confusing matters of php and domain transfers. Honestly, I’m non the wiser for it but I am a Glasgow girl, and I am stubborn so I will tackle this bugger and hopefully have a shiny, lovely new site for my troubles.

I’ve loved having wordpress.com look after me but the time has come to get more professional. For all my regular readers, worry not, my web address is still staying the same www.theglasgowscullery.com but might possibly go offline for a couple of days while I toil away and tear my hair out. My new hosting company Bluehost has assured me that the transfer process is easy peasy so we shall see.

I’d love to hear your experiences of going down the self hosting route. Was it worth the hassle? Was it a straight forward process or a total nightmare? Did you go grey in the process?

Comment below or drop me a wee email at cherylmckenzie83@gmail.com

Much love

Cheryl x


Boston baked beans

Boston baked beans

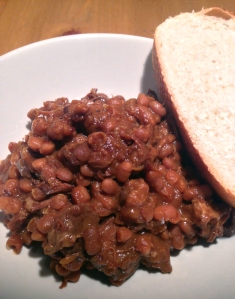
I will hold my hands up and admit that this dish will win no beauty contests. It’s kind of mushy, brown and lumpy. However, I know my readers to be kind non-judgmental souls who would never base their opinions on looks alone. You see, if you look past its facade and delve right in there with your fork or maybe a big hunk of buttery bread, your taste buds will be tantalised and your mind blown. Yup, seriously!

Joking aside though, Boston baked beans are pretty darn awesome and so so easily to make. Depending on your tastes they can also be easily adapted and tweaked to your liking. I’d say this was a good base recipe that ticked all the boxes but I think next time I’d like to try a bit of smoky heat in it, with some chipotle chilli or maybe even some paprika. Dig in and enjoy!

Ingredients

500g dried haricot (navy) beans
700g pork shoulder, cut into 1 inch cubes
1/3 cup black treacle
1/3 soft brown sugar
4 tbsps Dijon mustard
1 large onion, diced
5 cups water

Method

Place all of your ingredients into your slow cooked, mix well before placing the lid on and cooking on low for 10-12 hours. As a rough guide, I made mines just before bedtime and left them to cook overnight for around 10 hours. Before leaving for work I switched the slow cooker off completely before turning back on for 2 hours later that evening to finish cooking. Ideally, you could cook them all in one go, but I’m always scared to leave my slow cooker on when I’m out of the house. It’s also a good idea to check liquid levels every couple of hours and give them a bit of a stir.

After 10-12 hours the pork will be melt-in-the-mouth tender, the beans will be soft but still hold their shape and the sauce will be rich, dark and delicious. Serve up in big bowls and sit back to graciously receive high-praise from your loved ones. Told you it was easy 🙂

Serves 4 as main meal or 6 as a side dish

Chilli ginger chicken with udon noodles

Chilli ginger chicken udon

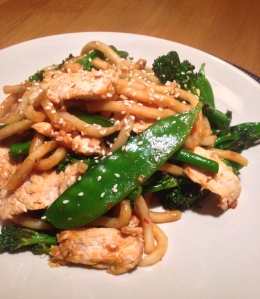
This is a really simple ‘throw it all together’ kind of recipe that can be on your plate in 20 minutes flat. The noodles have a beautiful chunky yet silky texture that works wonderfully with the soft chicken and chilli, lime and ginger flavours. The additional of the broccoli and mangetout also gives the dish a healthy bite and helps you on your way to your 5-a-day. Gorgeous vibrant summer eating at its best.

Ingredients

2 large chicken breasts
1 lime, zested and juiced
1 inch piece fresh ginger, grated
4 tbsps sweet chilli sauce
3 tbsps dark soy sauce
1 tbsp sesame seeds
1 tbsp sesame oil
200g tenderstem broccoli
100g mangetout
300g udon noodles

Method

Place the chicken breasts in an oven proof dice and make several deep slashes with a sharp knife. Add the sweet chilli sauce, lime zest and lime juice to the dish and make sure the chicken is coated all over. Place in a preheated oven at 180˚C for 20 minutes until the chicken is cooked.

Ten minutes into the chickens cooking time, start preparing the noodles. Place the noodles in a large bowl and cover with boiling water, leave to soften for 5 minutes.

In a large frying pan or wok, heat the sesame oil and pan fry the broccoli and mangetout for 2 to 3 minutes.  Now add in the grated ginger and soy sauce and mix well. Drain the udon noodles and add to the frying pan, stirring continuously. By this time, the chicken should be ready so remove from the oven and thinly slice on a chopping board before adding to the noodle mix along with the chilli/lime sauce in the bottom of the oven dish. Add the sesame seeds and use tongs to toss the mixture through before plating up. Add an extra little sprinkle of sesame seeds to each plate to finish.

Serves 2


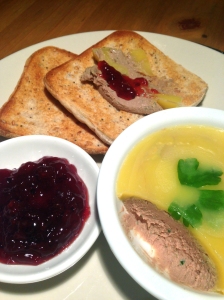
Chicken liver pate with brandy

Chicken liver pate

Even from a young age, I’ve always been a lover of pate. I used to always ask my mum to make it as a starter at Christmas time. Indeed, Christmas time always brings a myriad of ‘special’ pates to the shops, flavoured with brandy, port, redcurrents and cranberries. When you move away from the winter months, the ones on offer in the shops become a bit hum drum and I find, in this case, I have no choice but to make my own. So here it is folks, a good all-rounder recipe that you can add to or flavour accordingly to your own taste.

Ingredients

tbsp olive oil
1 small onion, finely chopped
rasher bacon, chopped
500g chicken livers, cleaned and trimmed
tbsps brandy
100ml single cream
salt and pepper, to taste
tbsps butter
clarified butter  – amount dependant on size of serving bowl

Method

Heat the oil in a large frying pan and saute the onion and bacon until the onion is softened but not browned. Add the cleaned liver and cook until it just changes colour. Pour in the brandy, allow it to cook down before adding the cream. Add salt and pepper and and cook until liver is almost cooked through, it should only take a couple of minutes.

Place mixture into a food processor with the butter, process until smooth. Transfer to a serving bowl, flattening the pate out before you cover with clarified butter or press clingfilm down onto pate to stop the top discolouring. Keep in the fridge for 24 hours for flavours to develop before serving. Serve with crisp breads or oatcakes and a redcurrent jelly.

Serves 6-8


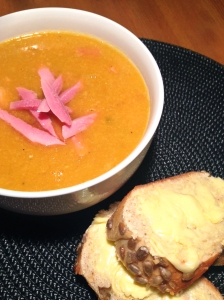
Split pea and ham soup

Split pea and ham soup

All soups are not made equal. Some have exotic names, unpronounceable ingredients and garnishes worthy of the Turner Prize. This is not one of those soups. This is a soup that your granny probably made, and her granny before that. Serve it up to your granny and she’ll most likely tell you you’ve done it all wrong. No matter, soups like these stand the test of time because they taste delicious, fill up hungry tummies and are so simple they can be committed to memory. You can’t argue with that!

Ingredients

3 cups chopped cooked ham
3 carrots, grated
2 celery stalk, roughly chopped
1 tbsp vegetable oil
1 small onion, sliced
2 ltrs water
3 ham stock cubes
2 cups dried yellow split peas
Pepper

Method

The night before you want to make your soup, take 2 cups of dried yellow spit peas and put them in a large jug or bowl and cover them with cold water to soak overnight.

After soaking your peas overnight, rinse them well under cold running water, drain and set aside. Heat  the vegetable oil in a large soup pot and add the chopped onions, grated carrot and chopped celery. Cook for 5 minutes until the veg start to soften up. Add in the drained split peas, crumbled stock cubes and water. Stir well then leave to gently simmer away for 90 minutes. After 90 minutes, check to see that the peas are cooked through then remove from the heat. Use a food processor or stick blender to blend the soup to a smoother consistency. Add the chopped ham and season with freshly ground black pepper and return to the heat for 10 minutes for the ham to heat through. Serve in big bowls with lots of buttered crusty bread.

Serves 4


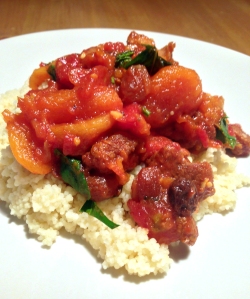
Fruity lamb tagine

Lamb tagine

I got given a lovely tagine for Christmas, which up until last night had been living unhappily in my kitchen cupboard, longing to be used and loved. Seeing as it was Sunday and I had a wee bit of extra time, I decided to give the tagine its debut and cook up a delicious fruity lamb stew (or tagine) in it. This dish is really easy to throw together but does require a bit of prep time – the lamb needs to marinade in the spice mix for a couple of hours then cooking itself takes about 2 and a half hours. It’s worth every minute though, the end result really is devine and despite having a lot of meat in it, is actually very summery and light. It was so yummy in fact that both me and the boyfriend ended up polishing off seconds, whoops!

Ingredients

1kg diced lamb shoulder
2 tsp ground cinnamon
2 tsp ground cumin
2 tsp ground turmeric
2 tbsp sweet paprika
2 tbsp olive oil
2 onions, diced
4 cloves of garlic, minced
50g sultanas
2 tbsp honey
1 tsp saffron stamens
750ml chicken or lamb stock
2 x tins chopped tomatoes
150g dried apricots
handful of coriander leaves, chopped
small handful of mint leaves, chopped

Method

Combine all of the dry spices in a large mixing bowl with the cubed lamb. Mix well, cover with cling film and leave to marinade in the fridge for 2 -3 hours (or overnight if you’re uber organised).

Once the meat is marinated and you are ready to make your tagine, preheat your oven to 160˚C. Heat the olive oil in a large frying pan and brown the meat in batches. Transfer the browned meat to your tagine dish (a large saucepan or casserole dish with a tight fitting lid would work just as well).

Once the meat is done, start on the sauce – fry the onions and garlic for 3-4 minutes until the onions have softened. Add in the sultanas, dried apricots, saffron and honey and stir well, cooking for another minute. Now add in the tinned tomatoes and stock. Stir everything together then transfer the sauce to the tagine. Make sure everything is mixed really well before popping the lid on and placing in the oven. The tagine should take around 2 – 2 1/2 hours depending on the cut of lamb you have used, just keeping checking the lamb for tenderness every now and then.

Just before serving, check for seasoning adding salt and pepper if needed and stir in the chopped herbs. I served my tagine over some fluffy couscous which mopped up all of the juices.

Serves 4

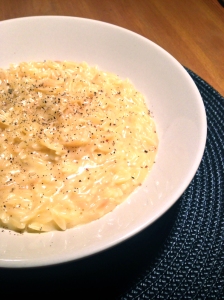
Orzo with a buttery cheese sauce

Cheesy orzo

I was absolutely delighted last week to find out that my local Morrisons had started to stock orzo pasta. They usually only stretch to spaghetti, penne or fusilli so I was well impressed. For those not familiar with orzo, its pasta shaped like large grains of rice and when cooked has a firm but creamy consistency – a bit like risotto but slightly firmer. It works really well with creamy oozy sauces like the one below and is very moreish. Paired with a glass of wine and a good movie, it was comfort food heaven and made for a lovely Saturday night in.

Ingredients

3 cups chicken stock
150g dried orzo pasta
1 tbsp butter
1/3 cup of freshly grated parmesan cheese
salt and pepper, to taste

Method

Preheat a medium sized saucepan and add the butter, once it melts add the orzo and cook it for about 3 to 4 minutes, stirring constantly to stop it from sticking until it develops a brown nutty colour. Add the chicken stock and bring it to a boil, reduce the heat to medium low and let it cook for about 10 to 15 minutes or until the orzo is fully cooked and the chicken stock has been absorbed. Remove from the heat and stir in the grated parmesan and check for seasoning.

Serves 2


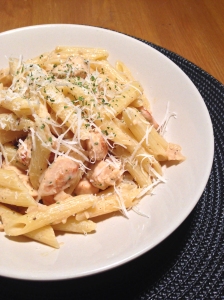
Creamy chicken and white wine pasta

Creamy chicken pasta

Lets talk about chicken! There’s quite a bit of it on my blog – you’ll find curries, soups, salads and even a full bird or two. If however, you had to rewind the clock to two years ago, you wouldn’t have found even a tiny little morsel. You see, up until fairly recently I was a bit of a chicken-a-phobe, just thinking about it made me go all funny. I can clearly remember the looks I used to get when I told them I didn’t eat chicken, “Are you a vegetarian?” they would ask, clearly bewildered and confused. I have no idea where this phobia came from or what triggered it but it was a royal pain in the butt.

Fast forward to present day, and after gradually re-introducing it to my diet, I would say I’m pretty much over my odd phobia. I’m still a wee bit iffy about other people cooking it for me and wouldn’t dream of ordering it in a restaurant but so long as I’m preparing it myself, I’m generally okay with it.

Basically, my point is, after all my waffling on, is that I’m glad I finally did finally become a poultry lover, because otherwise I would be missing out on lovely dinners like this one here. I’m only human, I have flaws and I sometimes have weird freaky habits and tastes, but I know a tasty dinner when I see it, and this one is the biz…

Ingredients

1 tbsp olive oil
2 small chicken breasts, diced into small chunks
1 small onion, finely diced
2 cloves garlic, minced
150ml chicken stock
100ml white wine
100ml single cream
1/3 cup grated parmesan cheese
Salt and freshly ground black pepper
1 tsp ground coriander, to serve
150g dried penne pasta

Method

Cook your pasta in a large pot of boiling, salted water according to packet instructions. While the pasta is cooking, heat the olive oil in a large non stick frying pan and add the diced chicken. Cook for 3-4 minutes until the chicken starts to brown. Add in the diced onion and garlic and cook for another 2 minutes. Add the wine and cook for 2 minutes until the liquid has reduced down. Now add the chicken stock and cream, stir well and leave the sauce to bubble away gently for 10 minutes until it has thickened up and is a creamy consistency. Remove from the heat and stir in the grated parmesan, dried coriander, salt and black pepper. Once the pasta is cooked, drain it and add it to the sauce, mixing well to coat. Serve up with some extra shavings of parmesan.

Serves 2

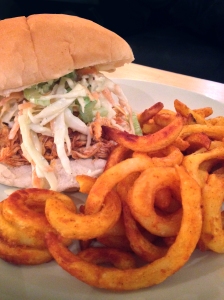
Buffalo chicken burger with blue cheese coleslaw

Buffalo chicken burger

The ‘pulled meat’ phenomenon has been around for decades in the States but has only really taken off properly in the last year or two here in the UK. All of a sudden pulled pork and chicken are popping up all over the place, in cafes, bistros and supermarket ready meals. The only problem with the recent surge in popularity, is that many versions of the dish are just plain rubbish – bland, tasteless and giving the genuine article a bad name. Having first sampled the real deal over in the US a good 10 years ago and haven fallen in love with it instantly, this makes me really sad. So as a homage to the good stuff, this recipe is inspired by our American cousins and their crazy ways. I hope I’ve done them proud…

Ingredients

Pulled buffalo chicken

3 cooked chicken breasts, shredded with 2 forks
8 tbsps hot sauce
8 tbsps unsalted butter, melted
1 1/2 tbsps white wine vinegar
1/2 tsp cayenne pepper
1/2 tsp garlic powder
1 tsp Worcestershire sauce
Salt and freshly ground black pepper, to taste
4 burger buns

Blue cheese coleslaw

2 cups white cabbage, shredded
1 carrot, shredded
1/2 cup mayonnaise
2 tbsps grainy mustard
1 lemon (juice)
Salt and pepper, to taste
1/4 cup blue cheese (crumbled)


Method

To make the buffalo chicken – Cook the chicken breasts and shred the meat using two forks then set aside. In a small saucepan, melt the butter then add the garlic powder, cayenne pepper, worcester sauce and hot sauce. Once the ingredients have melted together, simmer on a low heat for 2 minutes then remove from the heat. Stir the sauce through the shredded chicken.

To make the blue cheese coleslaw – Mix the shredded cabbage and carrot in a large bowl. Mix the mayo, crumbled blue cheese, mustard, lemon juice, salt and pepper into the shredded cabbage and carrot.

To assemble the burger, lightly toast the burger buns when pile on a generous helping of the buffalo chicken and top with the coleslaw. I served mine with some curly fries and it was scrumptious.

Serves 4


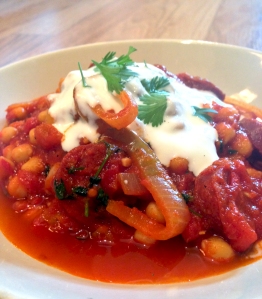
Chorizo and chickpea stew

Chorizo and chickpea stew

I’ve been feeling slightly nostalgic about cooking these last couple of weeks and have had the urge to dust off old recipes that have been tried and tested many a time. This is one of these such recipes.

Having first made it about 7 or 8 years ago, it went down a treat and to date I must have made it at least another 20 times since. I’ve never made this for someone who hasn’t loved it and requested it again.

So yeah, if you happen to be looking for a fail safe, works every time recipe, this would definitely be my recommendation. Guaranteed or your money back as they say…

Ingredients

2 medium onions, sliced
200g chorizo, sliced
1 tbsp olive oil
2 cloves garlic, minced
1 large red chilli, finely chopped (leave seeds in if you like it hot)
2 tsps smoked paprika
600g cooked and drained chickpeas (I use canned)
2 tins chopped tomatoes
300ml water
Large handful chopped coriander
Salt
Pepper
Natural yoghurt, to serve
Crusty bread, to serve

Method

In a large wok or frying pan, heat the olive oil and throw in the sliced onion. Cook for 3 to 4 minutes until the onion has softened. Toss in the sliced chorizo and cook for a further 2 minutes until the chorizo starts to release its oils. At this point add the garlic, chilli and paprika and stir well. Now add in the drained chickpeas, tinned tomatoes and water. Stir well and leave to simmer away on a low heat for 20 minutes.

After 20 minutes the sauce should have reduced down and the chorizo and chickpeas will have softened slightly and had a chance to absorb all of the yummy flavours. Remove from the heat and season as needed before stirring in the chopped coriander. Serve up with dollops of natural yoghurt to tame the heat and some lovely crusty bread to soak up all the juices.

Serves 2 (plus lunch leftovers)

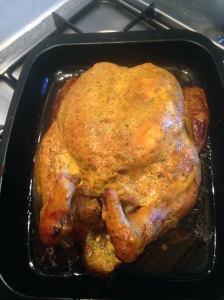
Indian roast chicken

Indian roast chicken

I’m always looking for variations on the traditional roast chicken. Now, don’t get me wrong, a classic roast chicken is delicious and can’t be beat, but sometimes a change can be nice. In this case, I used a variety of flavoursome indian spices to create a spicy yoghurt marinade which is basted straight onto the bird throughout cooking. By golly it was good!

Ingredients

1 medium to large roasting chicken
1 cup low fat natural yoghurt
1 tsp garam marsala
1 tsp tumeric
1 tsp ground cumin
1 tsp garlic powder
1 tsp smoked paprika
2 tsps coriander leaf
2 tsps mild curry powder
1 lime, halved
Salt
Pepper

Method

Preheat your oven to 180˚C. Place your chicken into a deep roasting dish and season the skin and cavity with salt and pepper. Half the lime in two and place into the cavity. Mix the yoghurt and spices together in a small bowl to make the marinade. Using a basting brush, generously coat the chicken thoroughly with the marinade. Cover the chicken loosely with foil and put into the oven. Cook the chicken, basting with the marinade every 30 minutes or so, then removing the foil for the last 20 minutes. My chicken took 2 hours and 10 minutes to cook but as a general rule, you need to cook the chicken for 25 minutes per 500g, plus an extra 25 minutes. The juices should run clear when a skewer is inserted into the thickest past of the thigh.

When the chicken is cooked, remove from the oven, cover loosely with foil and leave to rest for 15-20 before carving. This chicken is delicious served up with mango chutney and homemade pitas or flatbreads (click here for my flatbread recipe).

Serves 4 with leftovers.

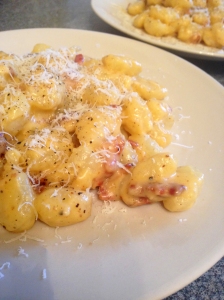
Gnocchi Carbonara

Gnocchi carbonara

Everyone loves Carbonara, right? With its velvety smooth sauce punctured with little bites of sweet salty bacon, sharp speckles of freshly ground pepper and shavings of parmesan – whats not to love about it.

Rather than use the traditional spaghetti as its carrier, I decided to try using gnocchi for a modern take on a classic dish. The result was delicious, the slight chewiness and bite of the gnocchi worked wonderfully and gave the sauce something more solid to cling to. I would never disregard a classic but I think this updated version has certainly overtaken the original in my favourites list.

Ingredients

500g shop bought gnocchi (if you have a wee bit more time on your hands, here is a link to my home-made gnocchi)
6 slices smoked streaky bacon, chopped
2 cloves garlic, minced
1 tbsp salted butter
100ml single cream
3 egg yolks
1/2 cup freshly grated parmesan
Freshly ground black pepper

Method

Cook the gnocchi in a large pot of salted boiling water according to pack instructions. This should take 10-12 minutes and you know it is ready when the gnocchi floats to the surface. Mean while, heat a large frying pan and dry fry the chopped bacon for 10 minutes until it is lovely and crispy. Remove from the pan and set aside. Add the garlic to the bacon fat and cook for 1 minute. Turn off the heat. Once the gnocchi is ready, drain then return to the pot. Stir in the cooked bacon and garlic (include the bacon fat for extra flavour), then add the egg yolks, cream and grated parmesan. Stir well to combine everything. The heat from the bacon will cook the eggs. As soon as the sauce is smooth, serve up with lots of freshly grated black pepper and a few more sprinkles of parmesan cheese.

Serves 2

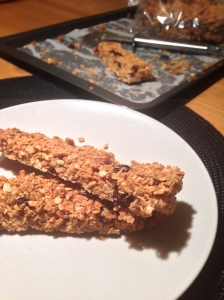
Fruit and nut granola bars

Fruit and nut granola

I’m not a morning person – my boyfriend can testify to that. The poor soul has to listen to my two alarm clocks (yes, two) beep away intermittently for a good 30 minutes before I even open an eyelid.

So not surprisingly, I’m not a breakfast person either. I can easily go to lunchtime before a morsel crosses my lips, then the hunger kicks in and I end up eating a HUGE lumberjack sized lunch. As I get older and wiser though, I realise that skipping breakfast isn’t a great idea so I’ve been trying to find ways of incorporating fairly nutritious foods that aren’t too elaborate and unobtrusive into my morning routine.

This is where the granola bars come in – they pack a decent punch, are filled with lots of lovely oats, nuts and raisins but are still fairly small and can be munched on without too much fuss while I’m working away at my desk. The sweetness from the honey and vanilla almost tricks you into thinking its a biscuit or cake. Sneeky little buggers…

Ingredients

6 cups rolled oats (porridge oats but not the quick cook kind)
1/2 cup chopped mixed nuts
1/2 cup chopped walnuts (or other nut of your choosing)
3/4 cup raisins
1/2 cup sunflower oil
1 tsp salt
3/4 cup brown sugar
3/4 cup runny honey
1 tbsp vanilla extract

Method

Preheat your oven to 190˚C. MIx the oil and salt in with the oats then spread the oats over a couple of baking trays in a thin even layer. Bake them in the oven for 15-20 minutes until the oats start to go a lovely golden colour. Remove the oats and transfer to a large mixing bowl. Turn your oven down to 170˚C. Mix in the fruit and nuts to the oats mixture. In a small pot, melt the sugar, honey and vanilla extract together, stirring until all of the lumps have dissolved.

Carefully pour the liquid into the oats and stir well making sure that all of the oats are coated. Take a large flat baking tray and line it with parchment or baking paper to stop the mixture from sticking. Using the back of a spoon, press the mixture down into the tray in a flat even layer, making sure it is tightly packed down. I found it helpful to wet my hands and press the mixture down with my palms to get it smooth and even. Place the baking tray in your preheated oven and bake for 35 minutes.

Remove the tray from the oven and leave to cool for 10 minutes. After 10 minutes cooling the bars oats will have firmed up a bit but still be soft enough to cut into bars. If you leave it any longer than 10 minutes, the mixture will harden and you wont be able to cut them up easily. I started cutting my bars using a large kitchen knife but after a bit of trial and error I found that a pizza cutter worked best.

Makes approximately 20 bars.

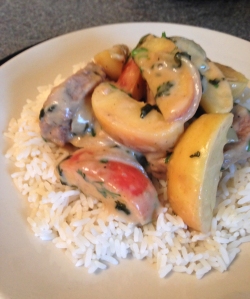
Pork with apples and creamy cider sauce

Pork apple cider

I’ve been a very naughty food blogger this past week. I’ve been cooking some old faithfuls and didn’t get round to posting any new recipes. Thats the problem with food blogging, you are constantly striving to create new weird and wonderful concoctions and tend to ignore the classics that you know and love.

This is a recipe that I’ve been making for years, but somewhere along the line, has fallen off the radar and been forgotten in favour of more impressive fodder. Pork and apple is a classic flavour combination, but the addition of cider and a hint of cream really bring it to life. Hope you enjoy!

Ingredients

400g pork loin, sinew removed and cut into 1/2 inch slices
1 large onion, sliced
2 large sweet apples, cut into segments
1 tbsp vegetable oil
1 tsp brown sugar
Plain flour, for dusting
Salt
Pepper
1 tbsp concentrated chicken stock
250ml cloudy cider
100ml single cream
1 large handful fresh coriander, chopped
Rice, to serve

Method

Remove the white sinew from the pork loin with a sharp kitchen knife then cut into 1/2 slices. Dust each slice with some seasoned flour and set aside. Heat the vegetable oil and sugar in a large frying pan over a medium heat, then add the onions. Stir and cook for 3-4 minutes until the onions are soft. Add in the pork slices and cook for 2 minutes before turning.

Once the pork slices have been turned, add in the cider and chicken stock concentrate and use the bottom of a wooden spoon to scrape any caramelised bits from the bottom of the pan. Add in the apple slices and single cream. Turn the heat to high and leave everything to simmer away for 15 minutes. After 15 minutes, your pork will be cooked through and the sauce will have reduced down to a thick and creamy consistency. Remove from the heat and stir in the chopped coriander. Serve over white rice.

Serves 2 (big portions)

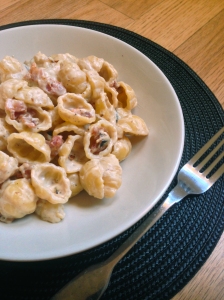
Creamy bacon and caramelised onion pasta

Bacon and onion pasta

Lets talk about weaknesses. Chocolate, sugar, ice cream, donuts even – forget about it, I’m just not interested. My food weaknesses are of the savoury variety. In particular, bacon; cheese; carbs and cream. These are my partners in crime, the guys that are going to get me into some serious trouble.

Bacon is the star of this recipe, and on that note, let me share a clip from the XFM Ricky Gervais radio show featuring Stephen Merchant and Karl Pilkington. It’s an oldie but a goody and is probably my favourite ever bacon related story. It made me snort out tea through my nose when I first heard it many years ago and still makes me chuckle to this day 🙂

Ingredients

200g dried pasta
4 slices thick cut streaky bacon, sliced
1 medium onion, sliced
2 cloves garlic, minced
100g lo-fat cream cheese
50ml single cream
100ml chicken stock
1 egg yolk
Salt and pepper, to taste

Method

Cook your pasta in boiling salted water according to pack instructions, this should take approx. 10-12 minutes. While the pasta is cooking, heat a large frying pan and dry fry the chopped bacon until it is golden and crispy. Once cooked, remove the bacon and set aside. Reserve the bacon fat and fry the sliced onion for 5-6 minutes until the onion starts to caramelise. Add in the garlic and cook for 1 more minute. Now add the cream cheese, single cream and chicken stock and stir well. You might need to add a tiny bit of water to thin the sauce down. Remove the sauce from the heat and stir through the egg yolk which will give an added richness to the sauce.

Crumble in the bacon then stir through the cooked and drained pasta. Check for seasonings and add some salt and freshly ground black pepper if needed.

Serves 2

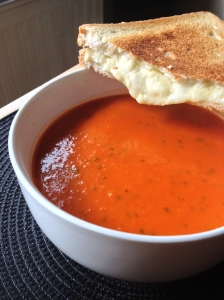
Boozy tomato soup with grilled cheese dunkers

Tomato soup

You think you know what a good tomato soup tastes like, huh? Think again. Once you’ve gone to the dark side, you’ll never go back. Make this tonight then curse yourself for not having it in your life sooner.

Ingredients

1 cup cream sherry
1 large onion, finely chopped
2 cloves garlic, minced
2 chicken stock cubes/stock pots
Large carton tomato juice
2 tins chopped tomatoes
250ml single cream
4-5 tbsp sugar (adjust according to taste but I like mine to be sweet)
Large handful fresh basil leaves, shredded
Salt
Pepper
1 tbsp olive oil

Method

Heat oil in large pot and saute onion and garlic for a few minutes, making sure garlic doesn’t burn. Add sherry and let simmer for a minute or so until strong alcohol smell subsides. Add in chopped tomatoes, tomato juice, chicken stock cubes and sugar. Simmer for couple more minutes. Add in single cream and leave to bubble gently for 15-20 minutes, topping up with a little water if needed. Add shredded basil leaves and season with salt and pepper to taste.

You can leave the soup slightly chunky but I prefer to blend it smooth with a stick blender. If I’m feeling really naughty (which is often), I make grilled cheese sandwiches to go along side the soup and dunk them in. Yeah, you heard. Grilled cheese dunked in soup. Amen to that.

Serves 4

Chicken and Prawn Laksa

Chicken and Prawn Laksa

I just can’t seem to get enough chilli this week. I’ve been eating it until my eyes have watered and my nose has gone runny. But yet, I still want more. Tonight, for dinner, I made chicken and prawn laksa – a deliciously hot and spicy soup, speckled with fiery red chillies, hot curry paste and mellowed out with coconut milk and lime juice. It was AMAZING!

I vividly remember the first time I had laksa. It was around 8 years ago and after finishing uni, I took a gap year to go travelling round Australia. I was about six weeks into my trip and I had just spent the last couple of weeks travelling through the outback in a drafty rust bucket of a camper van. We had just arrived in Melbourne, all feeling tired, cold and absolutely ravenous. There was much excitement as we drove over the Yarra River into the bustling hub of city life. It felt good to be back in a populated area! It felt even better knowing we had so many wonderful restaurants at our disposal – we had after all spend the last two weeks grilling sausages and burgers on a gas camping stove.

We ended up in a little Malaysian eatery on Swanston Street. It didn’t look much from the outside and kind of resembled a school canteen on the inside with its long tables and benches. I ordered prawn laksa, which to be honest, I had never heard of and only picked because I was in the mood for soup. I’m not sure what I was expecting but when a big steaming bowl of hot spicy broth arrived, I was over the moon. As a bonus they also brought out little plates filled with garnishes – freshly chopped chilli, handfuls of chopped coriander, wedges of lime and bean sprouts – so that you could tailor it to your liking. That first mouthful, it was like nothing I had ever tasted before. That day I fell in love with laksa, and I love it just as much to this very day.

Ingredients

2 chicken breasts, grilled and thinly sliced
150g raw king prawns, peeled and deveined
1 large red chilli, seeds removed and finely diced
3 cloves garlic, minced
1 tbsp sunflower or vegetable oil
2 tbsps Thai red curry paste
2 tbsps smooth peanut butter (this is not an authentic laksa ingredient but I like the sweetness it gives to the soup)
1 tbsp fish sauce
1 tbsp dark soy sauce
1 tbsp lime juice
1 tbsp sugar
1 tin coconut cream (use the really thick stuff, if using coconut milk double the quantity and reduce amount of chicken stock)
1000ml chicken stock
100g bean sprouts
300g ribbon rice noodles
2 handfuls chopped coriander, plus extra to serve
Lime wedges, to serve

Method

Heat the oil in a large soup pot, add the chopped chill and garlic and cook for 1 minute. Next add in the curry paste, peanut butter, fish sauce, soy sauce, lime juice and sugar and cook for a further 2 minutes. Stir in the coconut cream and chicken stock and mix well. Add in the sliced chicken, rice noodles and bean sprouts. Cook on high for 10 minutes. Add the raw prawns for the last 2 minutes of cooking. Remove from the heat and stir in the chopped coriander.

Spoon into deep bowls and garnish with some extra coriander and wedges of lime.

Serves 4

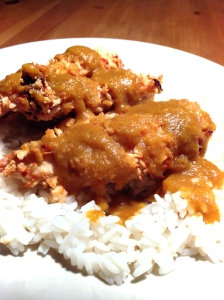
Katsu chicken curry

Katsu curry

I’ve been sampling curries from around the world this week, and todays curry is brought to you from Japan.

The katsu curry is wildly popular in Japan and first came to my attention when eating out in restaurants Wagamama and Yo Sushi. It’s ridiculously simple in its construction but packed full of flavour. You have the soft fluffy white rice which soaks up the sauce and strips of moist chicken with a crispy crumb coating. However, the star of the show is the sauce – sweet and creamy with a hint of spice, it really is delicious.

Traditional katsu uses pan fried chicken but I decided to make things a little healthier by oven baking mine. I also like my curries to be quite mild so I used a mild curry powder, but you can use a medium or hot powder if you’re a braver soul than me.

Ingredients

For the breaded chicken
400g mini chicken breast fillets
Salt and pepper to taste
4 tbsps plain flour
1 egg, beaten
75g panko breadcrumbs
White rice, to serve

For the curry sauce
2 tbsps sunflower oil
2 onions, thinly sliced
5 garlic cloves, minced
2 medium carrots, grated
2 tbsps plain flour
5 tsps curry powder (I used mild but you can use medium or hot if you like your curries to be hot)
600ml chicken stock
2 tsps honey
1 tbsp dark soy sauce
1 bay leaf
1 tsp garam masala

Method

For the curry sauce: Heat oil in medium non-stick saucepan, add onion and garlic and cook until softened. Stir in grated carrots and cook over low heat for 5 minutes. Add flour and curry powder and cook for 1 minute. Gradually stir in stock then add the honey, soy sauce, garam masala and bay leaf. Slowly bring to the boil. Turn down heat and simmer for 20 minutes or until sauce thickens but is still of pouring consistency. Use a food processor or stick blender to blend the sauce to a smooth consistency.

For the chicken: Preheat your oven to 200˚C. Season the mini chicken breast fillets with salt and pepper. Place flour, egg and panko breadcrumbs in separate bowls and arrange in a row. Coat the chicken breasts in flour, then dip them into the egg, then coat in breadcrumbs, making sure you cover both sides. Cook in your preheated oven for 20 minutes until the chicken is golden brown and cooked through.

Serve the chicken fillets over fluffy white rice with a generous drizzle of katsu sauce over the top. Yummy!

Serves 4


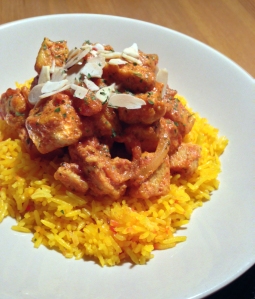
Quorn tikka masala

Quorn tikka masala

Rumour has it that chicken tikka masala was invented in Glasgow in the 1970’s, the story being that a chap had ordered chicken tikka from an Indian restaurant in Glasgow’s West End and sent it back to the kitchen because he thought it was too dry and needed some sort of sauce with it. The quick thinking chef doused it in a creamy tomato sauce and behold, the tikka masala as we know it, which has gone on to become a British institution, was born.

Whether there is any truth in this story, we’ll probably never know, but there’s no denying that wherever it’s origin, it’s a pretty darn good curry – creamy and comforting with just the right amount of heat.

If you do a search for tikka masala on the internet, you’ll notice hat no two recipes are the same. Everyone seems to have their own variation using a wide variety of ingredients. In the same spirit, I decided to create my own version using what I had to hand. I also decided to substitute the chicken for Quorn to make it a wee bit healthier.

Ingredients

300g Quorn chicken style pieces, frozen
1 tbsp olive oil
1 medium onion, thinly sliced
2 cloves garlic, minced
1 tsp ground ginger
1 tsp garam masala
1 tsp turmeric
1 tsp ground cumin
1/2 tsp hot chilli powder
3 tbsp smoked paprika
2 tsp dried coriander leaf
1 tbsp sugar
1 tin chopped tomatoes
1 cup low fat natural yoghurt
2 tbsps single cream
Salt, to taste
Sliced almonds, to serve
Rice, to serve

Method

Heat the olive oil in a large frying pan. Add the sliced onions and garlic and cook for one minute. Add in all of the dried spices and sugar and cook for another minute or two or until the onions have softened. Next add in the frozen Quorn pieces, stir well then add the tinned tomatoes, low fat yoghurt and single cream. Stir well then turn the heat down and leave to simmer for 20 minutes, stirring occasionally. Your tikka masala sauce should have reduced down by half and be lovely and thick. Serve over rice and top with some sliced almonds.

Serves 4

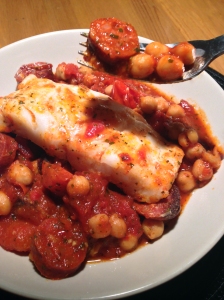
Cod and chorizo traybake

Cod and chorizo bake

I’m a bit of a wimp when it comes to fish. If it in any way resembles a fish i.e. fins, skin or god forbid eyeballs, then you can count me out. Call me a hypocrite but I like my fish in neat little rectangular fillets, all nice and clean, boned and nestled in some plastic packaging with a price sticker on it.

This is one of my safe fish dishes. The fish hardly needs anything done to it and even a fish-a-phobe like me would be hard pushed to mess it up. It also looks awfully pretty all plated up, and not an eyeball in sight…

Ingredients

2 medium cod fillets, skinned and boned
1 large chorizo sausage, cut into thick slices
1 tin cooked chickpeas, drained
12 cherry tomatoes
1 tin chopped tomatoes
1 tbsp smoked paprika
2 cloves garlic, minced
1 tsp dried red chilli flakes
2 tsps dried coriander
Drizzle olive oil
Salt
Pepper

Method

Preheat your oven to 200˚C. Place the chorizo, chickpeas, cherry tomatoes, garlic, chilli, coriander and chopped tinned tomatoes in a large heat proof casserole and mix well using a spoon, making sure the mixture is spread evenly over the bottom. Cook in your preheated oven for 15 minutes.

After 15 minutes, remove the casserole from the oven, stir then carefully place the cod fillets on top. Drizzle the fillets with a little olive oil and season well with salt and pepper. Place the dish back in the oven for a further 15 minutes until the fish is cooked through.

Serve up in shallow bowls with warm crusty bread to soak up all the juices. Delish!

Serves 2

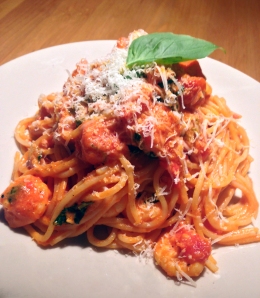
Creamy garlic prawns with spaghetti

Creamy prawn spaghetti

This is a great dinner to throw together if you’re running short on time and doesn’t scrimp on flavour either. The creamy tomato sauce is very comforting and the garlic prawns give a satisfying bite. My other half took one mouthful and immediately asked if there was enough for seconds – the look of disappointment on his face when I said there wasn’t would have melted the coldest of hearts. So, umm yeah, feel free to double the recipe if you’re cooking for any of the men in your life, pretty sure it wont go to waste 😉

Ingredients

300g dried spaghetti
200g raw prawns, peeled and deveined
1 tbsp olive oil
2 cloves garlic, minced
1 tsp dried chilli flakes
2 tbsps sugar
2 tbsps tomato puree
1 tin chopped tomatoes
150ml single cream
2 handfuls fresh basil leaves, shredded
Parmesan cheese, to serve

Method

In a large pot, cook the spaghetti according to pack instructions. One ready, drain and set aside.

To make the sauce heat the olive oil in a large frying pan. Add in the garlic and chilli and cook for 1 minute. Add the prawns, sugar and tomato puree and stir well. Next add in the chopped tinned tomatoes and single cream, stir then turn down heat to low and simmer for 5-6 minutes until the prawns have turned pink and the sauce has reduced down. Turn off the heat and add the drained spaghetti and toss through to make sure the sauce is distributed evenly. Serve up with a generous sprinkle of grated parmesan cheese.

Serves 2

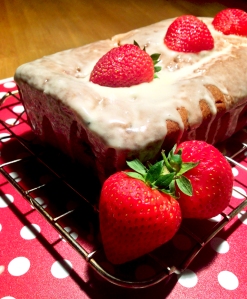
Strawberry cake with a vanilla cream glaze

Strawberry cake

Summer is finally here and strawberries are finally back in season. I’m not a huge fruit fan to be honest but strawberries are one of the few fruits that I will quite happily much away to my hearts content.

I was doing my weekly shop in Morrisons the other day and they had a great deal on – 2 huge punnets of strawberries for £3, total bargain which I snapped up straight away. I’ve been seeing lots of gorgeous strawberry bread and cake recipes around recently and desperately wanted to have a go a making this lovely strawberry cake with a very naughty, but delicious sounding vanilla glaze.

The cake was really yummy and moist and wasn’t overly sweet which is just the way I like it, and the glaze, oh my goodness, the glaze was divine. I could quite happily have taken a bath in the stuff (taking in a spoon with me of course).

Ingredients

Cake
250g self-raising flour
1 tsp baking powder
1/2 tsp salt
1/4 tsp ground cinnamon
1 large egg
150g granulated sugar
50g light or dark brown sugar
240ml buttermilk
80ml vegetable oil
2 tsps vanilla extract
1 and 1/2 cups fresh strawberries, chopped into small pieces

Glaze
120g icing sugar
1/2 tsp vanilla extract
70ml double cream

Method

Preheat oven to 175˚C. Spray a 9×5 loaf pan with nonstick spray.

To make the cake, in a large mixing bowl, toss the flour, baking soda, salt, and cinnamon together until combined. Set aside. In a medium bowl, whisk the egg, granulated sugar, and brown sugar together until combined. Whisk in the buttermilk, oil, and vanilla. Slowly pour the wet ingredients into the dry ingredients and gently whisk until there are no more lumps. Try not to over-mix as this will leave your cake dense, fold in the strawberries.

Bake the cake for 1 hour and 20 minutes. Poke the center of the bread with a toothpick at 1 hour 10 minutes, if it comes out clean, the cake is done. If it comes out wet, bake for another 10 minutes. Allow the cake to cool completely in the pan on a wire rack before glazing and slicing.

To make the glaze whisk the icing sugar, vanilla, and cream together then drizzle over the cake before serving. You can top with sliced strawberries for decoration if you want to be all fancy pants 🙂

This cake can also be baked as muffins. 16-18 minutes bake time at 175˚C.

Serves 6-8


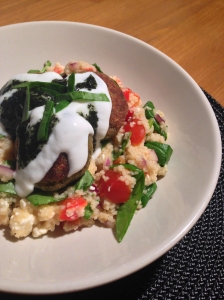
Summer couscous with falafel

Falafel and summer cous cous salad

This is a gorgeous light and healthy meal, perfect for a light dinner on a summer evening or a delicious take-to-work or picnic lunch. It’s packed full of big flavours and just shouts out summer.

I used shop bought falafels for this dish, simply because I was a bit short on time and wanted something I could throw together quickly, but if you have the time, homemade falafel would be delicious.

Ingredients

12 shop bought falafel (warmed through)
1 cup dried couscous
1 vegetable stock cube
1/2 small red onion, finely diced
1/2 red pepper, finely diced
1 cup cherry tomatoes, quartered
2 handfuls baby spinach, shredded
1 clove garlic, minced
1 small red chilli, seeds removed and finely chopped
Salt
Pepper
400ml boiling water
Greek yoghurt, to serve
Mint sauce, to serve

Method

Boil your kettle while the falafel are heating in the microwave (follow pack instructions on timings). Chop all of your veg and set aside. Add the couscous and crumbled stock cube to a large mixing bowl then add the boiled water, stir well then cover with a tea towel and leave for 5 minutes until all the liquid has been absorbed. After 5 minutes, fluff up with a fork and season well with salt and pepper. Add the chopped chilli, garlic and diced veg to the couscous and mix well.

To serve, spoon the couscous onto a serving platter or plate and top with the heated falafel. Spoon over some greek yoghurt and a drizzle of mint sauce. Easy peasy, a healthy delicious family meal in less than 15 minutes.

Serves 4

Jamie Oliver’s basic bread recipe

Basic bread

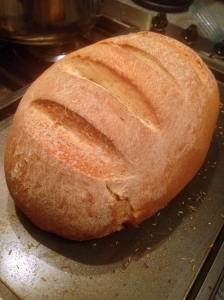
I’ve been hunting about for a good basic bread recipe for a while now. When it comes to bread making there seems to be so many tips and tricks, methods and best practices floating about. For the novice bread maker like myself, this can be mighty daunting and more than a tad confusing. Where to start?

In the end, I went with Jamie Oliver’s basic bread recipe (see original recipe on his website here). I went with Jamie’s recipe because I like Jamie, the chap knows his onions and doesn’t faff about with unnecessary nonscence. And you know what, it turned out an absolute treat. No longer will I be hunting for another recipe, this one will do me just fine. In the words of the man himself – pukka!

Ingredients

1kg strong bread flour
625ml tepid water
30g fresh yeast, or 3 x 7g sachets dried yeast
2 tbsps sugar
1 level tablespoon fine sea salt
flour, for dusting

Method

(In Jamies words, not mine, because he explains things better than I could)

Stage 1: making a well
Pile the flour on to a clean surface and make a large well in the centre. Pour half your water into the well, then add your yeast, sugar and salt and stir with a fork.

Stage 2: getting it together
Slowly, but confidently, bring in the flour from the inside of the well. (You don’t want to break the walls of the well, or the water will go everywhere.) Continue to bring the flour in to the centre until you get a stodgy, porridgey consistency – then add the remaining water. Continue to mix until it’s stodgy again, then you can be more aggressive, bringing in all the flour, making the mix less sticky. Flour your hands and pat and push the dough together with all the remaining flour. (Certain flours need a little more or less water, so feel free to adjust.)

Stage 3: kneading!
This is where you get stuck in. With a bit of elbow grease, simply push, fold, slap and roll the dough around, over and over, for 4 or 5 minutes until you have a silky and elastic dough.

Stage 4: first prove
Flour the top of your dough. Put it in a bowl, cover with cling film, and allow it to prove for about half an hour until doubled in size – ideally in a warm, moist, draught-free place. This will improve the flavour and texture of your dough and it’s always exciting to know that the old yeast has kicked into action.

Stage 5: second prove, flavouring and shaping
Once the dough has doubled in size, knock the air out for 30 seconds by bashing it and squashing it. You can now shape it or flavour it as required – folded, filled, tray-baked, whatever – and leave it to prove for a second time for 30 minutes to an hour until it has doubled in size once more. This is the most important part, as the second prove will give it the air that finally ends up being cooked into your bread, giving you the really light, soft texture that we all love in fresh bread. So remember – don’t fiddle with it, just let it do its thing.

Stage 6: cooking your bread
Preheat the oven to 180°C/350°F/gas 4. Very gently place your bread dough on to a flour-dusted baking tray and into the preheated oven. Don’t slam the door or you’ll lose the air that you need. Bake for 25-30 minutes or until cooked and golden brown. You can tell if it’s cooked by tapping its bottom – if it sounds hollow it’s done, if it doesn’t then pop it back in for a little longer. Once cooked, place on a rack and allow it to cool for at least 30 minutes – fandabidozi. Feel free to freeze any leftover bread.
 

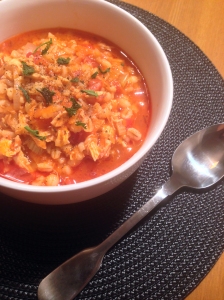
Chicken soup for the soul

Chicken Soup

When I think of chicken soup, I can’t help but visualise the creamy, textureless goop that comes in a can with a Heinz label on it. This is why, when you ask me, I tend to say “Chicken soup? Oh, not for me thanks”. Maybe it’s also the association it has with being the ideal ‘sickness’ food. I dunno, but I’ve never been a fan. That is, until tonight. This chicken soup changed things. It CHANGED THINGS I tell you.

I had made a roast chicken for dinner the night before (click here for the recipe) and was left with quite a bit of left over chicken. On a whim I decided to muddle it together into some sort of chicken and barley broth, and my goodness, it was bloody delicious and not at all like the creamy slop from my childhood.

The barley gives it a lovely chunky texture and the tomato, chilli and paprika give it a pleasant kick which put a bit of fire in your belly. It’s taken me 30 years, but I think I might like chicken soup now.

Ingredients

1 tbsp olive oil
2 medium onions, sliced
3 cloves garlic, minced
4 celery sticks, sliced
2 large carrots, grated
1 cup pearl barley
1 tin chopped tomatoes
1 tsp dried red chilli flakes
1 tbsp smoked paprika
2 tbsps tomato puree
4 cups cooked chicken, shredded
1000ml chicken stock
800ml water
Salt and pepper

Method

Heat the olive oil in a large soup pot and add the onion and celery. Cook for 3-4 minutes then add in the garlic, chilli, paprika, carrot and tomato puree. Stir well and cook for another minute or two before adding the pearl barley and chopped tinned tomatoes. Add in your stock and top up with water. Throw in the shredded chicken, stir then leave to simmer for 45 minutes until the veg and barley are cooked through. Season really well with salt and freshly ground black pepper before serving.

Serves 6

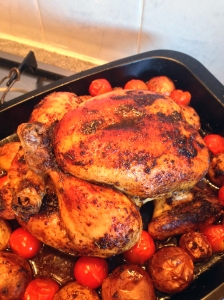
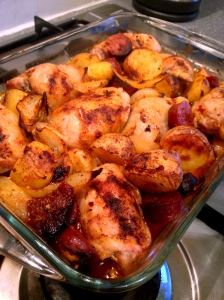
Paprika roast chicken

Paprika roast chicken

This is one of those recipes that looks mega impressive and is bursting full of spanish flavours but (shhh don’t tell anyone) literally takes 5 minutes of prep and requires zero brain power, which is okay with me. The chicken turned out juicy and succulent with a golden crispy skin and lots of smoky, sweet and slightly spicy overtones.

All you need is a chicken, some baby new potatoes, a handful of cherry tomatoes, a sprinkling of spice and a slash of olive oil. Writing out a recipe hardly seems necessary but here goes anyway…

Ingredients

1 medium chicken
3 tbsps olive oil
1 tbsp smoked paprika
1/2 tbsp garlic powder
1/2 tbsp dried thyme
1 tsp cayenne pepper
2 tsp salt
1 tsp black pepper
500g baby new potatoes
250g cherry tomatoes

Method

Preheat your over to 200˚C. Rinse and pat dry your chicken and place in a large roasting tray. Mix all of the spices and seasoning together in a small mixing bowl and set aside. Use a basting brush and generously cover the entire chicken with a coating of olive oil, making sure to get into all the nooks and crannies. Sprinkle the spice mixture over the oiled chicken skin and use your hands to rub the mixture in. Throw the baby new potatoes into the bottom of the roasting tray so they surround the chicken.

Roast the chicken in the middle of your preheated over for 1 hour 30 mins (adjust according to the weight of your chicken), basting the skin with the pan juices several times. Throw the cherry tomatoes into the roasting dish for the last 20 minutes of cooking. The chicken is done when the juices run clear from a skewer inserted into the thickest part of the chickens thigh.

Serve with a big leafy green salad and some crusty bread to soak up the juices.

Serves 4

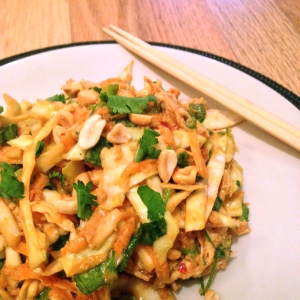
Thai chopped chicken salad

Thai chopped salad

This absolutely gorgeous salad is taken from the Pinch of Yum website. The flavours are really punchy and explode, gloriously in your mouth. This salad is lovely and filling on it’s own but equally yummy as a sandwich or wrap filling. It really comes into its own the next day once the flavours have had time to mingle and get to know each other a bit better. Highly recommended! You can find the original recipe here.

Ingredients

Salad
2 boneless skinless chicken breasts
1 small head green or white cabbage (2 cups shredded)
1 large carrot, grated
½ cup fresh coriander
½ cup spring onions
½ cup chopped peanuts

Dressing
2 cloves garlic, minced
3 bird’s eye chili peppers (sub ½ teaspoon minced hot pepper)
2 tbsps soy sauce
2 tbsps rice wine vinegar
2 tbsps sugar
1 tbsp fresh lime juice
1 tbsp oil
½ tsp fish sauce
¼ cup peanut butter
¼ cup water

Method

Bring a large pot of water to boil. Add the chicken breasts, cover, and cook for 15-20 minutes. When the chicken is done, remove from heat, drain water, let cool, and shred with two forks.
Shred the cabbage into fine strips. Peel and grate the carrots. Roughly chop the coriander and spring onions. Toss the chicken and vegetables in a large bowl and keep chilled.
Mince the garlic and chili peppers. Place garlic and peppers in a small mixing bowl with the soy sauce, vinegar, sugar, lime juice, oil, and fish sauce. Whisk until smooth. Add the peanut butter and water and whisk again until smooth and creamy.
Toss the salad with the dressing. Add the crushed peanuts. Serve chilled. Leftovers can be stored in the fridge for up to one day.
Serves 4


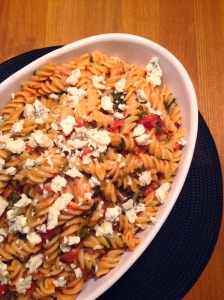
Creamy tomato and blue cheese pasta

Tomato blue cheese pasta

I’ve been feeling a bit poorly this week and my body was seeking out some serious comfort food. My comfort foods of choice are usually steaming hot bowls of thick and brothy soup or a big ol’ plate of soft pasta with a rich and creamy sauce. The pasta option won me over because despite feeling a bit icky, I was still absolutely ravenous. My dear friend soup was just going to have to wait for another day.

I was looking for some comfort food recipe inspiration, and one of my favourite places to look is The Pioneer Woman website. That lady sure knows her comfort food and every recipe I’ve ever tried of hers has become a firm favourite and made over and over again.

Her pasta selection is overwhelmingly scrumptious and given the choice, I could happily feast my way through ever single recipe of hers. One recipe in particular caught my eye though – Pasta with Tomato-Blue Cheese Sauce.

I’ve adapted her recipe slightly to suit my taste, namely ramping up the sugar and blue cheese quantities (oh, I’m naughty) but haven’t changed it around too much. I’m pleased to report that it was absolutely divine and satisfied my needy tummy and soul a treat. Food really does heal all wounds!

Ingredients

400g dried pasta
2 tbsps olive oil
3 cloves garlic, minced
1 tin chopped tomatoes
1 1/2 tbsps white sugar
1 tsp dried chilli flakes
1 cup blue cheese, crumbled
2 tbsps sour cream
1 cup frozen spinach (or 2 cups fresh spinach)
salt and pepper

Method

Cook the pasta in salted boiling water according to packet instructions. To make the sauce, heat the olive oil in a large frying pan and add the garlic, chilli and sugar, stirring for 1 minute. Add in the chopped tomatoes and season well with salt and pepper. Crumble in 3/4 of the blue cheese and stir until it has melted into the sauce. Add the sour cream and spinach then let simmer slowly for 10 minutes until the spinach has defrosted and melted into the sauce.

Drain your cooked pasta and mix through the tomato and blue cheese sauce. To serve, crumble over the remaining 1/4 cup of blue cheese.

Serves 4


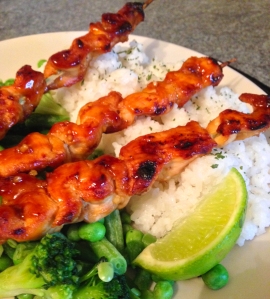
Honey lime chicken with sticky coconut rice

Honey lime chicken

Holy moly! I’m blowing my own trumpet here but this was AWESOME and is swiftly getting added to my favourite meals of all time list (which is growing to monstrous proportions I might add). The honey, lime and coconut were made for each other and create a meal full of robust, sweet and tangy flavours. My only regret is not making enough for leftovers 😦

Ingredients

Honey lime chicken
2 chicken breasts, sliced into long thin strips
2 tbsps soy sauce
3 tbsps clear honey
2 tbsps lime juice
1 garlic clove, minced
lime wedges, to serve

Coconut rice
1 cup short grain rice
1 cup coconut milk
1 cup water

Method

In a glass mixing bowl, combine the soy sauce, garlic, honey and lime juice and mix. Add the thinly sliced chicken strips and leave to marinade for at least 1 hour (overnight in the fridge is best if you have time). Once the chicken is marinated, thread into wooden skewers and cook under a hot grill for 10-12 minutes, turning frequently.

To cook the coconut rice, place the rice in a pot and cover with the water and coconut milk. Bring to a boil then cover with a lid, turn the heat down to low and simmer for 10-12 minutes until the rice is cooked through. Fluff up with a fork.

To serve, spoon the coconut rice onto a plate with some steamed green veg (i used a combo of green beans, broccoli and peas), the honey lime chicken skewers and wedges of lime.

Serves 2


Minted lamb and feta burgers

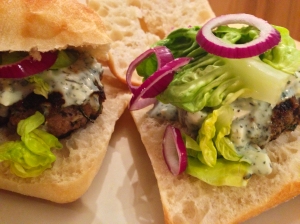
Minted lamb burger

Taking further inspiration from my recent trip to Turkey, I’ve gone a bit gaga for lamb. Lamb is one of those meats that needs very little done to it, simply grilled with a squeeze of lemon juice, gives you a meal fit for a king. If however, you want to play around with another classic flavour match, these burgers are a winner. The mint that is mixed through the burger really brings out the delicate sweetness of the meat, and paired with the salty and tangy dressing, the flavour smacks you square in the  (lamb) chops. Hehe

If burgers aren’t your thing, the mixture would also make absolutely delicious meatballs, or pushing the boat out – meatloaf!? Ok, I might have crossed the line there but it has got me thinking.

Ingredients

Burgers
1 tbsp olive oil
1/2 red onion, finely diced
500g lamb mince
2 tbsps mint sauce
2 tbsps flat leaf parsley, chopped
4 burger rolls
1 baby gem lettuce, to serve
thinly sliced red onion, to serve
salt and pepper

Feta and mint dressing
150g feta cheese, crumbled
4 tbsps greek yoghurt
1 tbsp mint sauce

Method

In a mixing bowl, combine the lamb mince, mint sauce, chopped flat leaf parsley and finely diced red onion, then season with salt and pepper. Mix well with your hands to combine all of the ingredients. Split the mixture into 4 and shape into burger patties. Heat the olive oil in a large frying pan and arrange the burgers evenly. Pan fry for 10-12 minutes, turning every couple of minutes until the burgers are cooked through.

To make the feta and mint dressing, combine the mint sauce and greek yoghurt in a small bowl and crumble in the feta and gently combine.

To assemble the burgers, split the burger rolls in half (toasting if you wish), add one of your lamb burgers and top with baby iceberg lettuce, thinly sliced red onion and a heaped spoonful of the feta and mint dressing.

Makes 4 burgers

Fish tacos

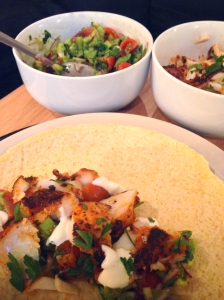
Fish tacos

I’ve had a little break from cooking while I’ve been away on holiday in turkey for the last couple of weeks. It was lovely going out for dinner every night and have someone else do the cooking for me. I have to admit though, that I’ve been itching to get back in the kitchen. My wee cooker looked sad and abandoned when I got back late on Friday.

Taking inspiration from the lovely, healthy salads and fresh fish I’ve been munching on whilst away, I decided to have a go at some fish tacos. They were really easy to throw together, after a little bit of prep to put together the salsa, the fish cooks really quickly in a matter of minutes. The tacos were bursting full of fresh, punchy flavours and were incredibly satisfying and filling as well as being super-duper healthy and low-fat.

Ingredients

Salsa
150g cherry tomatoes, quartered
2 spring onions, thinly sliced
1 garlic clove, minced
1 tbsp lime juice
1 tbsp extra virgin olive oil
sea salt and freshly ground black pepper
1 avocado, diced
1/2 cup flat leaf parsley, chopped
1/2 red onion, finely diced

Tacos
1/2 tbsp ground paprika
1/2 tsp garlic powder
1/2 tsp dried oregano
1/2 tsp cayenne pepper
1/2 tsp ground cumin
300g cod fillet (or any other white fish)
1 tbsp olive oil
soured cream, to serve
sea salt
4 corn tortillas, warmed through
flat leaf parsley, chopped

Method

For the salsa, mix together the ingredients in a serving bowl and set aside. For the tacos, combine the paprika, garlic powder, oregano, cayenne pepper and ground cumin in a bowl. Dust the fish fillets with the spice mix then pan fry with a little olive oil for 4 minutes on each side until cooked through. Flake the fish into a serving bowl. Heat the corn tortillas in the microwave for 45 seconds.

To assemble the tacos, take a tortilla and place a heaped spoonful of salsa down the middle, top with flaked fish and sour cream, wrap and enjoy!

Serves 2


Beef and pearl barley soup

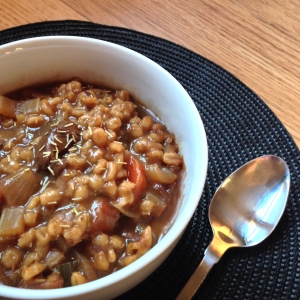
Beef and barley soup

Today I screwed up big time. Scotland basked in glorious sunshine today, and I, the numpty that I am, went to work wearing wooly tights and a cardigan. Bad idea! If that wasn’t enough, guess what I had for dinner? Soup! Hearty, winter soup teaming with chunky veg and melt in the mouth beef. My internal temperature gauge is all messed up.

So by all means, bookmark this recipe but file it away for a chilly day. It’s a darn good soup, just not for this time of the year. o(|:-)  <—-Thats me with a winter hat on!

Ingredients

1 tbsp butter
1 tbsp olive oil
375g stewing beef, diced into small chunks
1 tbsp marmite
1 tbsp worcestershire sauce
2 large onions, roughly chopped
2 carrots, chopped
3 sticks of celery, chopped
1 bay leaf
1 tsp dried rosemary
1 tbsp flour
salt, to season
pepper, to season
2 litres beef stock
150g pearl barley

Method

Heat the butter and oil in a large pot over a medium heat. Brown the meat, then stir in the marmite and worcestershire sauce. Keep stirring until the meat is fully browed and most of the liquid has evaporated. Throw in the carrot, onion, celery, rosemary and bay leaf. Place a lid on the pot, turn down to a low heat and leave until the veg has started to soften slightly, which should take around 10 minutes.

Stir in the flour, mix well making sure everything is coated, then pour in the stock. Season with salt and pepper and bring to the boil. Turn the heat down to a simmer, add the pearl barley and cook gently for about an hour. Remove the bay leaf before serving.

This soup is really thick (almost stew like in consistency) so you can thin it down with a little bit of water if you prefer. It also freezes really well.

Serves 4


Logic defying fruity chicken salad

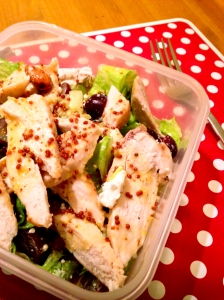
Fruity chicken salad

Let it be said that this salad is weird. Good weird, but weird none the less. The recipe was heavily inspired by a recipe on the Pinch of Yum website (you can see the original recipe here) but I’ve adapted it quite a bit. When I first came across this salad, I have to say, I initially recoiled in horror. I mean c’mon – chicken and grapes?! Is this a thing? Is it something that the US has embraced wholeheartedly? Well it sure aint a thing here in Scotland. Sheer curiosity made me try this recipe, and if I’m honest, there was a teeny tiny little bit of me that was hoping it would be horrible, just so I could say ‘I told you so’.

I won’t be saying ‘I told you so’ in this instance however. It was delicious, still weird, but darn delicious. Throw caution to the wind and try it for yourself. You might just like it.

Ingredients

For the Salad

2 large chicken breasts, oven baked and cut into thin slices
½ tsp salt
½ tsp pepper
2 cups red seedless grapes, halved
3 cups iceberg lettuce, sliced
½ cup feta cheese, crumbled
½ cup whole almonds

For the Dressing

1 tbsp butter, melted
1 tbsp olive oil
2 tbsps freshly squeezed orange juice
1 tbsp wholegrain mustard
1 tbsp honey
½ tsp garlic, minced

Method

Preheat your oven to 200˚C. Place your chicken breast on a non-stick baking tray, coat lightly with olive oil and season with salt and pepper. Bake for 20 minutes until cooked through. Remove from the oven, leave to cool then thinly slice and set aside.

Chop the grapes, feta, iceberg lettuce and combine in a large salad or mixing bowl. Add in the chicken and almonds and mix well to distribute the ingredients evenly.

To make the dressing, melt the butter then add all of the other dressing ingredients. Whisk until combined.

To serve, spoon onto a large serving dish and drizzle the dressing over the top.

Serves 4


Spanish chicken tray-bake

Spanish chicken

Tray-bakes are a glorious thing indeed. Just pop everything into a big casserole dish, throw it into the oven and let the magic happen. This dish takes around 5 minutes to prep, then you can relax and stick your feet up for the next hour. The finished dish has a lot of complex flavours which blend together nicely and will keep your tummy very happy indeed.

Ingredients

1kg chicken thighs (use thighs with the bone in and skin still on for maximum flavour)
100g chorizo, thickly sliced
2 tbsps olive oil
2 tbsps smoked paprika
2 cloves garlic, minced
2 tsps dried red chilli flakes
50g sun-dried tomatoes
300g baby new potatoes, halved
1 large spanish onion, cut into wedges

Method

Pre-heat your oven to 200˚C. Take a large oven proof casserole and pour half of the olive oil, half of the smoked paprika, minced garlic and chilli flakes over the bottom. Throw in the sliced chorizo, onion wedges, sun-dried tomatoes and baby new potatoes into the casserole and mix well to ensure everything is coated in the oil/spice mixture. Nestle the chicken thighs, skin side up in the casserole and use the rest of the olive oil and smoked paprika to coat the skins.

Cover the casserole loosely with baking foil, place in the middle shelf of your oven and cook for 40 minutes. After 40 minutes, remove the foil and cook for a further 25 until the chicken is cooked through and the skin is nice and crispy.

Serves 4

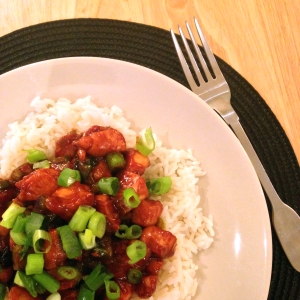
Bourbon chicken

Bourbon chicken

Ok, I confess, I failed dismally at my April meat-free endeavour. Let me hang my head in shame and dismay at my lack of willpower. However, life is too short to dwell on such things, especially when there are big steaming bowls of sticky, rich Bourbon chicken waiting to be devoured. The recipe below contains no actual bourbon (by all means, add some if you have it to hand) but still evokes the same smokey deliciousness.

I found this recipe on www.food.com (click here for the original), and with nearly 3000 reviews, I knew I had to give it a go. I changed the quantities slightly and altered the cooking technique to suit and the the resulting dish was fabulous beyond words.

Ingredients

600g chicken breasts, cut into small bite-size pieces
2 tbsps olive oil
1 garlic clove, minced
1/2 tsp ginger
1 tsp crushed red pepper flakes
1/4 cup apple juice
1/3 cup light brown sugar
2 tbsps ketchup
1 tbsp cider vinegar
1/2 cup water
1/3 cup soy sauce
White rice, to serve
4 spring onions, sliced on the diagonal


Method

Cut the chicken into small bite-sized pieces and place in a large mixing bowl. Add the rest of the ingredients and leave to marinade in the fridge for at least 30 minutes (if you have time to leave over night, all the better). Once marinaded, heat a large frying pan and add both the chicken and marinading liquor. Let it simmer away over a high heat for around 20-25 minutes, until the sauce has thickened and is sticky. Serve over fluffy white rice and sprinkle over a generous helping of sliced spring onions.

Serves 4

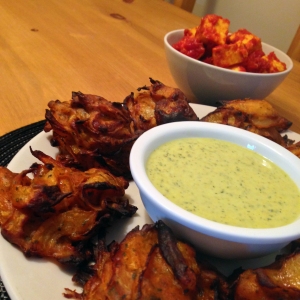
Baked onion bhajis with yoghurt and mint dipping sauce

Onion Bhaji

This was an Indian banquet on a somewhat smaller scale. I’ve always shied away from making my own Indian knick knacks  before, preferring instead to buy the packaged variety from the supermarket, thinking it would be ridiculously time-consuming and bound to go wrong. Not so! The bhajis were really easy to throw together and the only specialist ingredient I had to buy was the gram flour, all of the spices I already had. To keep them relatively healthy I decided to bake the bhajis in the oven rather than deep fry them.
At the last-minute I decided to rustle up a yoghurt and mint dipping sauce – which was really refreshing, and a side dish of pan-fried paneer in a honeyed tomato sauce. Yum yum yum.

Ingredients

Onion bhajis

4 medium onions, sliced 5mm thick
6 tbsps gram flour (chickpea flour)
1 pinch salt (for dry mix)
1/2 tsp cumin (for dry mix)
1/2 tsp ground coriander leaf (for dry mix)
1 tbsp tomato puree (for onion mix)
1/2 tsp ground turmeric (for onion mix)
1/2 tsp ground coriander (for onion mix)
1/4 tsp ground cumin (for onion mix)
1/4 tsp ground ginger (for onion mix)
1/4 tsp chilli powder (for onion mix)
extra-virgin olive oil, as needed
water, as needed

Yoghurt and mint dipping sauce

125ml plain lo-fat yoghurt
1/2 tbsp mint sauce
1 tsp ground turmeric
juice of half a lemon

Pan fried paneer in a honeyed tomato sauce

230g paneer, cut into bite sized cubes
1 tbsp olive oil
1/2 tsp ground ginger
1/2 tsp ground turmeric
1/2tsp ground cumin
1/2  tin chopped tomatoes
1 tbsp clear honey

Method

Onion bhaji – Preheat the oven to 200˚C  and line a large baking tray with baking parchment. Sweat the onions in a frying pan with some oil until they turn translucent for around 6-8 minutes. Sprinkle in the chilli powder and mix. Add the turmeric, cumin, ginger, coriander and stir well. Remove from the heat.

Place the chickpea flour, salt, coriander, cumin into a large bowl and mix. Add the onions and tomato puree into a bowl and mix. Add a little bit of water to get the correct consistency, it should be wet and easy to stir, but not sloppy.

Drizzle some oil onto the prepared tray, place 2 tablespoons of the onion mix onto the tray for each bhaji. Bake on the middle shelf of the oven for 20 minutes, drizzle a little oil on top of the bhajis and bake for an additional 15 minutes or until golden brown. Serve with the yoghurt and mint dipping sauce. Makes 8 large bhajis.

Yoghurt and mint dipping sauce – Combine the yoghurt, mint sauce, ground turmeric and juice of half a lemon in a bowl and mix well. Serve chilled. Serves 2.
Paneer  with honeyed tomato sauce – Cut the paneer into bite sized cubes and pan fry in a little olive oil until they start to colour. Add in the ginger, tumeric and cumin and cook for a further minute. Add in half a tin of chopped tomatoes and 1 tbsp of clear honey and mix well. Turn the heat down to low and let simmer for 2o minutes. Serve warm. Serves 2.


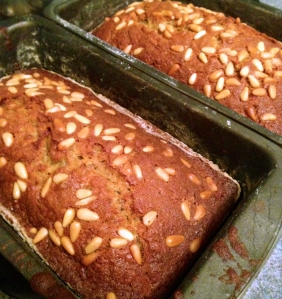
Best ever banana bread

Banana bread 1

I’m dedicating this recipe to my mum Margaret, because along with being the best mum a girl could ask for, she makes the most amazing banana bread ever. I’ve tasted many a banana bread in my time, and none have ever come close to this one. Call me biased if you will but i’m still adamant that this is the best. My mums been making this recipe for years and years, and everyone thats every tasted it has raved about it.

The recipe itself is easy peasy and you can’t really go wrong. The ingredients listed below will make two loaves, which you might think is a loaf too many, but trust me on this one, they will both be devoured in no time at all.

Ingredients

1 cup butter, softened
2 cups sugar
7 large ripe bananas, mashed
1 1/2 tsps vanilla extract
4 eggs, beaten
3 cups plain (all purpose) flour
1/2 tsp salt
2tsps bicarbonate of soda
Handfull pine nuts

Method

Cream the butter and sugar with an electric whisker, then blend in the bananas, vanilla and eggs. Whisk together the dry ingredients in a separate bowl then mix in the wet ingredients until just combined. Pour into two loaf tins which have been greased and floured (or lined with baking parchment). Sprinkle a scattering of pine nuts over each mixture. Bake in a pre-heated oven at 175˚C. Check on the bread at 45 minutes (it may take up to 60 minutes). The banana bread is done when a wooden skewer  inserted into the middle comes out clean. Cool the banana bread in the tin for 10 minutes before turning out onto a wire rack to cool.

Makes 2 loaves

Creamy mushroom and sherry soup

Creamy mushroom soup

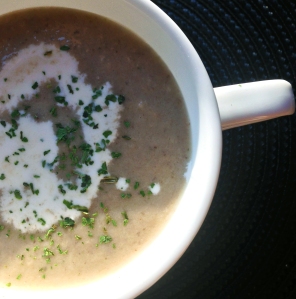
Soups are meant to be a winter thing, but I’ve always liked them all year round. They are great for squeezing in your daily quota of vegetables and can be surprisingly filling. This soup was very rich, made all the more luxurious by adding in the sherry. The sherry isn’t essential, but it gives it a punch, so I’d definitely recommend it.

Ingredients

1tbsp vegetable oil
1 large leek, thinly sliced
2 cloves garlic, minced
700g mixed mushrooms, sliced
800ml vegetable stock
100ml sweet sherry
200ml single cream
Salt, to season

Method

Heat the vegetable oil in a large soup pot and add the leeks and garlic. Cook for 2-3 minutes until the leeks start to soften. Add in the sliced mushrooms and sherry and cook for a further 5 minutes. Now add in the stock and cream, stir well then turn down your heat to medium and leave to simmer for 20-25 minutes. Remove from the heat and blend using a food processor or stick blender. Serve with a swirl of single cream and a sprinkling of chopped coriander.

Serves 4

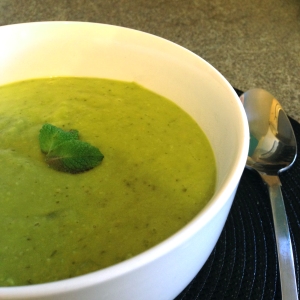
Pea and mint soup

Pea and mint soup

This is probably the easiest soup in the world to make. You throw everything in a pot, leave it for 20 minutes, then come back and puree it up. It really is as easy as that, and the soup itself tastes really fresh and zingy.

Ingredients

1 bunch spring onions, chopped
1 medium potato, peeled and diced
1 garlic clove, minced
1tbsp vegetable oil
850ml vegetable stock
500g frozen peas
4tbsp chopped fresh mint
1tbsp sugar
150ml lo-fat yoghurt
Salt, to season
Toasted pita breads, to serve

Method

Heat the vegetable oil in a large soup pot. Stir in the minced garlic and fry for 1 minute. Add the spring onions, potato,frozen peas, mint, sugar, stock and yoghurt. Stir well, turn heat down to medium and let it simmer away for 20 minutes.

After the 20 minutes, turn off the heat and using a food processor or blender, puree the soup to a smooth consistancy. Serve up with toasted pita breads for dipping.

Serves 4


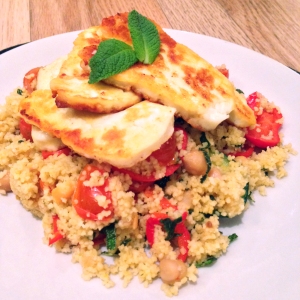
Summer couscous salad with grilled halloumi

Summer couscous with halloumi

Here in Scotland, whilst still very cold, the sun is starting to make more of an appearance. Summer is still a fair bit off but I can’t help but feel less wintery. I thought I would get myself in the mood by making a gorgeous salad, full of delicious summery veg and with a fresh mint dressing, all topped off with hot and salty grilled halloumi cheese. I originally found this recipe on the BBC Goodfood website (see original here) but I made a few tweaks.

Ingredients

250g couscous
250ml vegetable stock
400g tin chickpeas, drained
2tbsp vegetable oil
1 large courgette, cut into slices on the slant
200g cherry tomatoes, halved
1 large sweet red pepper, cut into thin strips
250g halloumi cheese, sliced and grilled

Dressing

50ml extra virgin olive oil
3tbsp lemon juice
2 garlic cloves, minced
2tbsp chopped fresh mint
2tsps sugar

Method

Tip the couscous into a bowl, pour the boiling stock over and mix well with a fork. Cover with a plate and leave for 4 minutes. Meanwhile, tip all the dressing ingredients into a bowl and mix well.

Heat 1 tbsp oil in a large frying pan and add the chickpeas, courgette slices, sweet red pepper and cherry tomatoes. Fry over a high heat for 5-6 minutes. Once cooked, add the vegetables and chickpeas to the couscous, then mix through well with a fork. Pour over the dressing and mix well.

In the same pan, pour in a little more oil and heat it up, then add the halloumi strips and fry for 2-3 minutes, turning them over from time to time, until crisp and brown. To serve, pile the couscous salad onto plates and place the grilled halloumi slices on top. Yummy.

Serves 4